世界中のラッキークラフトファンの皆さま~!Daily Flash Minnow Weekly Reportになります!
前回に引き続き、OPTIMUM BAITSからのリポートです。いよいよ、ルアー作製体験に入る事に!全工程は大きく分けて5段階
1. オリジナルカラーを決める
2. 型(どの種類のルアー)を決める
3. 色の調合をする
4. 実際に作製
5. 完成
1. 自分の作りたいオリジナルカラーを決めるにあたって、事前にマットさんから言われていたラッキークラフトルアーをサンプルとして持ち込んでカラー決めると調合カラーイメージがつき易く作製が容易になった。
今回は、Daily Flash Minnow Fishing Reportでも使用できる事を想定して、バス・ソルト両方で兼用できるようルアーが良いと考え
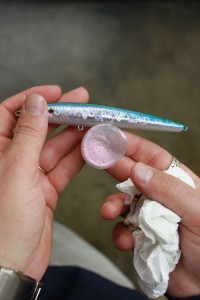
自分が好きなカラーを選んでみました。MS MJ Herring用意し、作製の工程に入る事にした。実際、ソルトでは販売していないカラーであるが、いい色である。
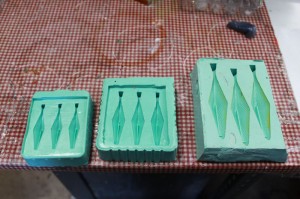
2. オリジナルカラーの決定後、OPTIMUMBAITSの沢山ある中からルアーデザインと、どのサイズのルアーを作製をするのかを決める。数多くあるタイプの中で悩んだ結果、Optimum Baitsで人気のあるあの【ダブルダイヤモンド】を作製することにした。
【BLT・蛙・ミミズなどの型もある】
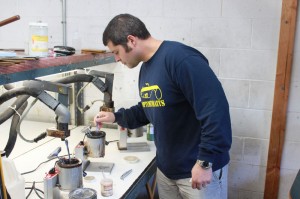
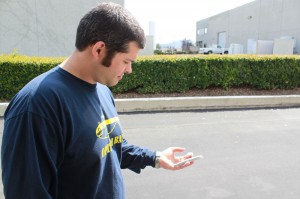
3. 先ほど決定した、オリジナルルアーの色を3色に分け事前に溶かしていたプラスティックソールに各色を調合し、ラメなどを入れ鱗に変わるものを少しずつ調合する。このとき最大で3色まで色を決定することが出来る。今回はサンプルカラーとしてMS MJ Herring (MS MJ オーロラ ワカサギ) を元にお腹の部分から、薄いピンク・少しブルーの入ったラメ入り無色・背中部分にグリーンバック合わせた緑と各ポットに色を調合していく。この作業がルアーので出来を決定するので微妙な分量で調合をしていた。さすがに僕には出来ない作業であった。写真では、MS MJ Herring (MS MJ オーロラ ワカサギ) のお腹部分の薄いピンク色を出すため、何回も調合をし、直射日光の下で色を確認しながら調整をした。
続きは次回にて
それでは皆さん!! See you soon!
次回は、【ルアー作製体験 完成編】
Sandy
“Optimum Baits Lure Developing Experience Part 1”
It is again time for the Daily Flash Minnow Weekly Report!
This is a continuation of my previous report of my visit to the Optimum Baits factory! And I would like to finally talk about my experience making the lures! There were 5 major steps to the process:
1. Choosing my original colors
2. Choosing a molding (depending on the type of lure I want)
3. Color mixing and preparation
4. Official making of the lure
5. Lure completed
1. About choosing my colors, Mat has previously advised me to bring some Lucky Craft lures as a color sample so it would be a lot easier for me to have a color image of what I want to create.
I wanted to be able to create something that I could use for this Daily Flash Minnow Fishing Report which would be a lure used for both Bass and saltwater fishing. I had chosen a color I really like: the “MS MJ Herring”. I got a sample of that color ready and started on my task. The “MS MJ Herring” is actually not sold for saltwater fishing purpose, but it is a very nice color.
2. After choosing the color, I had to decide on a lure design and size out of the many Optimum Baits carries. And finally out of the various types they had, I decided on the popular “Double Diamond” lure shape. (They also carry shapes like BLT, Frog, Worm, etc.)
3. The original color I chose previously was divided into 3 Plastic Sole colors which were getting melted in advance. I then slowly added some glitters and others to create a scale-like texture. Maximum of 3 colors can be chosen at this time. Based on the “MS MJ Herring” sample color chosen previously, the layers were carefully inserted into each container. And the layers started from the stomach part of the body with a light pink, then clear with a semi-blue glitter, and lastly a green colored back very similar to the original lure color. This process is the most important part where it determines the completed lure, so the amount of the mixture was carefully adjusted. This part was definitely too difficult for me to do. In the pictures shows Mat adjusting the color mixture over and over to get the right color for the light pink color used for the stomach area. He even went under direct sunlight and continued to check its color.
The rest will be continued on the next report…
See you soon!
The next report is “Lure Developing Experience Finale”
Sandy
